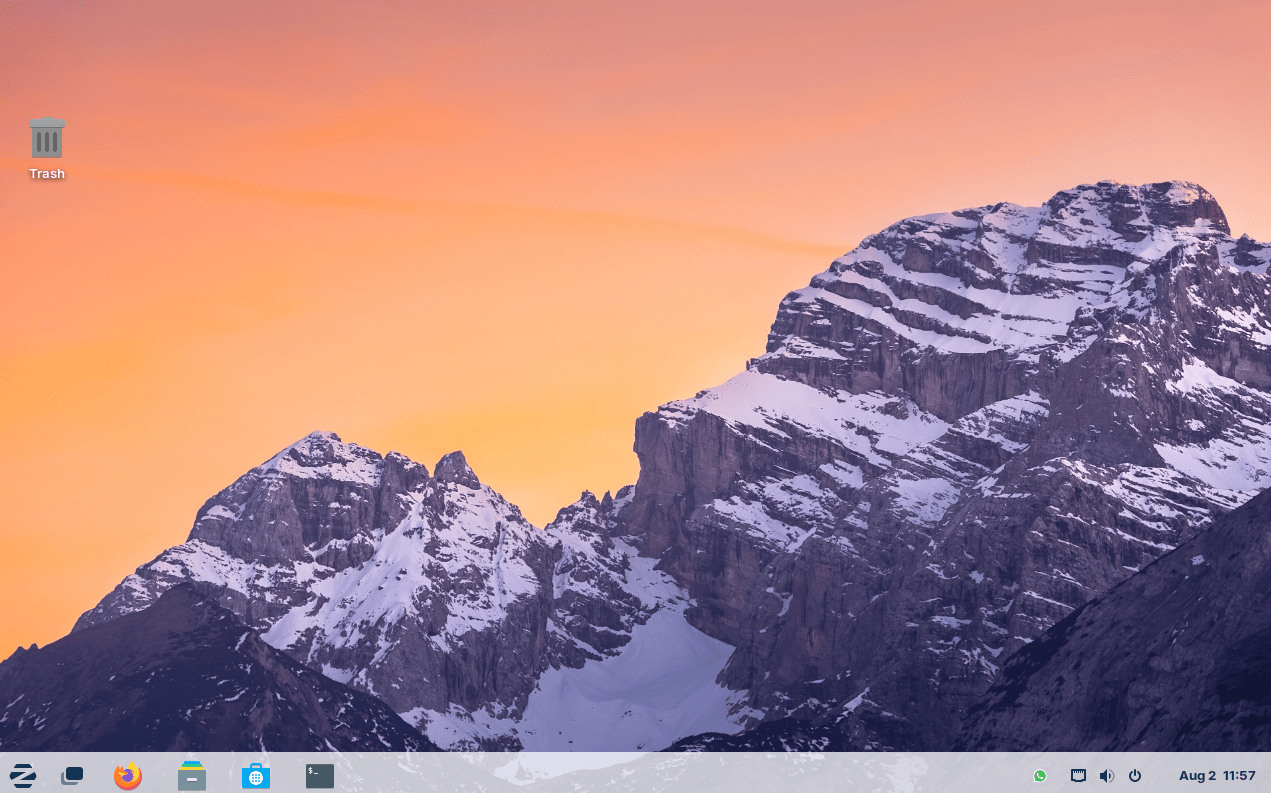
Editor’s notes: Installing Zorin is fairly easy. You can install beside Windows or as a standalone. One common problem is the installation USB does not contain all of the proper files. If you are using Rufus to burn your USB, consider switching over to Etcher. If you are using secure boot and already have a MOK password registered, you can enter it into the Zorin installation.
This guide will help you install Zorin OS on your computer. Whether you’re setting up a new system or trying out a different operating system, we’ve got you covered. From getting your system ready and creating a bootable USB drive to installing and setting up Zorin OS, each step is clearly explained to make the process easy and successful.
Key Takeaways
- Learn how to prepare your computer for installing Zorin OS, including backing up data and checking system compatibility.
- Get step-by-step instructions for downloading Zorin OS and creating a bootable USB drive.
- Understand how to configure BIOS settings to boot from the USB drive and start the installation.
- Follow a detailed guide to installing Zorin OS and setting it up for the first time.
- Explore tips for customizing Zorin OS, installing essential apps, and troubleshooting common installation issues.
Understanding Zorin OS
What Makes Zorin OS Unique
Zorin OS is a Linux distribution designed to be user-friendly for everyone, from beginners to tech enthusiasts. Built on the Ubuntu foundation, it offers a familiar environment for those switching from Windows or macOS. The developers aimed to make the transition to Linux as smooth as possible by providing a system that feels comfortable and intuitive.
Different Editions of Zorin OS
Zorin OS comes in several editions to cater to different needs:
- Zorin OS Core: The standard edition with all the essential features.
- Zorin OS Lite: A lightweight version for older or less powerful computers.
- Zorin OS Education: Tailored for students and educational environments.
- Zorin OS Pro: Packed with additional features and premium support.
System Requirements
Before installing Zorin OS, ensure your computer meets the following minimum requirements:
| Component | Minimum Requirement |
|---|---|
| Processor | 1 GHz Dual Core |
| RAM | 2 GB |
| Storage | 10 GB (Core & Lite) / 20 GB (Pro & Education) |
| Display | 800 × 600 resolution |
Zorin OS is designed to run efficiently on both modern and older hardware, making it a versatile choice for various users.
Preparing for Installation
Before diving into the installation of Zorin OS, it’s essential to get everything ready. This section will guide you through gathering the necessary resources, backing up your data, and checking system compatibility to ensure a smooth installation process.
Downloading Zorin OS
Choosing the Right Edition
When you’re ready to download Zorin OS, the first step is to pick the edition that fits your needs. Zorin OS offers several editions, including Core, Lite, and Pro. Core is great for most users, Lite is perfect for older or less powerful hardware, and Pro offers extra features for advanced users. Make sure to choose the one that aligns with your requirements.
Navigating the Zorin OS Website
To get started, open your web browser and head to the official Zorin OS website. The site is user-friendly and guides you through the download process. Simply click on the edition you want, and follow the prompts to start the download.
Verifying the Downloaded File
After downloading the Zorin OS file, it’s important to verify its integrity. This ensures that the file hasn’t been corrupted during the download. You can do this by checking the file’s checksum, which is usually provided on the download page. Compare the checksum of your downloaded file with the one listed on the website. If they match, you’re good to go!
Creating a Bootable USB Drive
Creating a bootable USB drive is a crucial step in installing Zorin OS on your computer. This guide will walk you through the process, ensuring you have everything you need to get started. Use Rufus or Etcher to burn the Zorin ISO on to your USB drive. Rufus is great, but if you have an issue, try it again with Etcher.
Configuring BIOS Settings
To start, turn on your computer. As soon as you see the motherboard or Windows logo, press the boot key. This key is usually F2 or Del, but it can also be F10, F12, or another key depending on your computer. If you’re unsure, you might need to look up the specific key for your computer model.
Once you’re in the BIOS menu, find the Boot Order settings. You’ll need to change the order so that your USB drive is the first boot option. This ensures that your computer will boot from the USB drive containing Zorin OS. Don’t forget to save your changes before exiting the BIOS menu.
In the BIOS settings, look for an option to enable USB boot. This might be under a section like ‘Boot Options’ or ‘Advanced Settings.’ Make sure USB boot is enabled so your computer can start from the USB drive. If you run into any issues, check your computer’s manual or look online for guidance.
Remember, configuring BIOS settings is a crucial step. Take your time and double-check each setting to avoid any hiccups during the installation process.
By following these steps, you’ll be well on your way to installing Zorin OS on your computer. Whether you’re using computer monitors or computer printers, ensuring your BIOS is set up correctly is key to a smooth installation.
Installing Zorin OS
Booting from the USB Drive
To start the installation, insert the bootable USB drive into your computer and restart it. Make sure your computer boots from the USB drive. If it doesn’t, you might need to change the boot order in the BIOS settings.
Navigating the Installation Menu
Once the computer boots from the USB drive, you’ll see the Zorin OS installation menu. Here, you can try Zorin OS without installing it or go straight to the installation. Choose the option to install Zorin OS and follow the on-screen instructions.
Completing the Installation Process
The installation process is straightforward. You’ll be asked to select your language, time zone, and keyboard layout. Then, you’ll need to choose the installation type. If you’re installing Zorin OS as the only operating system, select the option to erase the disk and install Zorin OS. If you’re dual-booting, choose the option to install Zorin OS alongside your current operating system. Follow the prompts to complete the installation. Once done, remove the USB drive and restart your computer. Welcome to your new Zorin OS environment!
Setting Up Zorin OS for the First Time
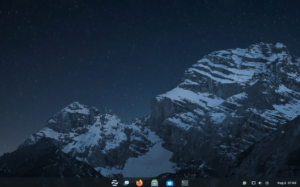
Initial Configuration
Once Zorin OS is installed, the first thing you’ll do is set up your system. This includes choosing your language, time zone, and keyboard layout. Zorin OS is ideal for new Linux users because it offers an intuitive setup process. Follow the on-screen instructions to complete these steps.
Connecting to the Internet
Next, you’ll want to connect to the internet. This can be done either through a wired connection or Wi-Fi. If you’re using Wi-Fi, click on the network icon in the system tray, select your network, and enter the password. A stable internet connection is crucial for downloading updates and additional software.
Installing Updates
After connecting to the internet, it’s important to install the latest updates. Open the Software Updater from the menu, and it will automatically check for updates. Installing these updates ensures your system is secure and running smoothly. The strong community support behind Zorin OS often releases updates to improve performance and security.
Dual Booting with Another Operating System
Dual-booting means having two operating systems on one computer. This lets you pick which one to use when you start your PC. It’s great for trying out different systems without needing extra hardware. Usually, one OS goes on the main part of the disk, and the other on a separate part.
Partitioning Your Hard Drive
Before you start, you need to split your hard drive into parts. One part will hold your current OS, and the other will be for Zorin OS. This step is important to keep both systems running smoothly.
Installing Zorin OS Alongside Windows
When you install Zorin OS, you’ll see an option to install it next to your current OS. Choose this to set up dual-boot. This option will not delete your files. Follow the steps on the screen to finish the setup.
Managing Boot Options
After installing, your computer will ask which OS to start each time you turn it on. You can pick Zorin OS or Windows. This makes it easy to switch between them whenever you want.
Dual-booting used to be hard, but now it’s simple. Just follow the steps to set it up and enjoy the flexibility of using two systems on one computer.
Post-Installation Tips
Congratulations on successfully installing Zorin OS! Now, let’s make sure you get the most out of your new system with some post-installation tips.
Troubleshooting Installation Issues

Common Installation Problems
Sometimes, things don’t go as planned during the installation of Zorin OS. Common issues include the system freezing, error messages, or the installation process getting stuck. These problems can be frustrating, but they are usually fixable.
Fixing Boot Issues
If Zorin OS doesn’t boot after installation, it might be due to incorrect BIOS settings or a faulty USB drive. Here are some steps to troubleshoot boot issues:
- Check BIOS Settings: Ensure that the boot order is set correctly and that USB boot is enabled.
- Test the USB Drive: Use a different USB drive or re-create the bootable USB to rule out any issues with the drive.
- Repair Boot Loader: Sometimes, the boot loader might need repairing. You can use tools like Boot-Repair to fix this.
Where to Find Help
If you’re still having trouble, don’t worry! There are plenty of resources available to help you out. The Zorin OS forums and community are great places to ask for assistance. Additionally, you can find helpful guides and tutorials online.
Remember, troubleshooting is a part of the learning process. Don’t get discouraged if things don’t work perfectly the first time. Keep trying, and you’ll get there!
Upgrading Zorin OS
When to Upgrade
Knowing when to upgrade your Zorin OS is essential for keeping your system secure and running smoothly. Regular updates bring new features, security patches, and performance improvements. It’s a good idea to upgrade when a new version is released or if you notice your current version is no longer supported.
Steps to Upgrade
Upgrading Zorin OS is a straightforward process. Follow these steps to ensure a smooth upgrade:
- Backup Your Data: Before starting, make sure to back up all important files. This is crucial in case something goes wrong during the upgrade.
- Check for Updates: Open the Software Updater from the menu and check for any available updates. Install them before proceeding.
- Download the Latest Version: Visit the Zorin OS website and download the latest version. Make sure to choose the right edition for your needs.
- Create a Bootable USB Drive: Use a tool like Rufus to create a bootable USB drive with the downloaded Zorin OS ISO file.
- Start the Upgrade: Boot from the USB drive and follow the on-screen instructions to upgrade your system.
Handling Upgrade Issues
Sometimes, things don’t go as planned. Here are some common issues and how to handle them:
- Boot Issues: If your system doesn’t boot after the upgrade, try booting from the USB drive again and selecting the repair option.
- Data Loss: If you experience data loss, restore your files from the backup you created earlier.
- Compatibility Problems: Ensure your hardware is compatible with the new version of Zorin OS. Check the system requirements on the Zorin OS website.
Upgrading your operating system can seem daunting, but with the right preparation, it can be a smooth and rewarding process. Enjoy the new features and improvements that come with the latest version of Zorin OS!
Whether you’re using refurbished laptops or refurbished desktop computers, keeping your Zorin OS up to date ensures you get the best performance and security.
Wrapping Up
Installing Zorin OS on your computer is a rewarding experience that opens up a world of possibilities. By following this guide, you’ve learned how to prepare your system, create a bootable USB drive, and navigate through the installation process. Whether you’re switching from another operating system or setting up a new machine, Zorin OS offers a user-friendly and powerful alternative. Now that you have Zorin OS up and running, you can explore its features and customize it to fit your needs. Enjoy your new operating system and happy computing!
Frequently Asked Questions
What is Zorin OS?
Zorin OS is a user-friendly operating system based on Linux. It’s designed to look and feel like Windows, making it easy for newcomers to switch.
Is Zorin OS free?
Yes, Zorin OS has a free version called Core. There are also paid versions like Pro with extra features.
What are the system requirements for Zorin OS?
You need a computer with at least 2 GB of RAM, 15 GB of storage, and a 1 GHz processor. For better performance, more RAM and storage are recommended.
How do I create a bootable USB drive for Zorin OS?
You can use tools like Rufus or Etcher to create a bootable USB drive. Just download the Zorin OS ISO file, open Rufus, and follow the instructions.
Can I install Zorin OS alongside Windows?
Yes, you can dual boot Zorin OS with Windows. During installation, choose the option to install alongside your current operating system.
What should I do if I encounter problems during installation?
If you run into issues, check the official Zorin OS forums or support page. They have solutions for common problems and a helpful community.
How do I update Zorin OS after installation?
Go to the Software Updater tool in Zorin OS. It will check for updates and let you install them easily.
Can I customize the look of Zorin OS?
Absolutely! Zorin OS lets you change themes, icons, and desktop layouts to suit your preferences.


